The Form widget Email settings allow you to assign where the form is sent to and customize the data that is sent.
In addition to adding your form’s email settings manually, these options also use Dynamic Tags. These tags allow you to retrieve WordPress data, or from plugin sources such as Advanced Custom Fields. Items that have the ability to use dynamic data will have the “stack” icon beside the fields input.
Settings
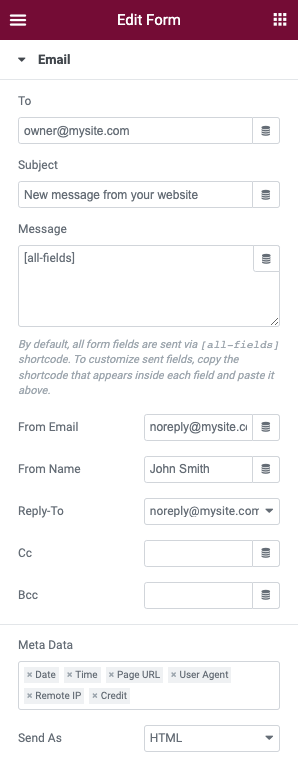
- To: Enter the email address of the recipient of the form
- Subject: Enter the text you wish to be displayed in the subject of the email
- Message: Here you may use the shortcodes of your form fields to create the message sent by the form. By default the “all-fields” option is used. Learn how to create custom messages for your form in this tutorial
- From Email: Enter the address of the sender or use a norepy@
- From Name: Enter the name, title, or company you wish to show in the email
- Reply To: Enter the address of the sender or use a norepy@
- Cc: Enter the email address of the recipient to be Cc’d (carbon copy)
- Bcc: Enter the email address of the recipient to be Bcc’d (blind carbon copy)
- Meta Data: Here you may add or remove additional metadata that is displayed at the bottom of the form. By default, all options are displayed
- Send As: in the dropdown, select whether to send the form as HTML or Plain text.