Create a cool sticky transparent header effect using Elementor’s CSS class.
You will learn how to:
- Make your sticky header transparent
- Use CSS to create an animation transition
- Change min-height when scrolling
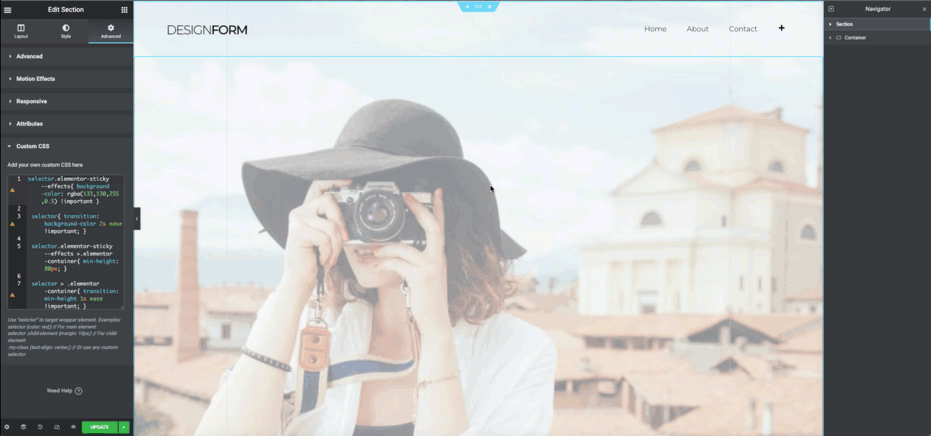
- Go to Templates > Theme Builder > Header and edit your header template.
- Right-click the header’s section handle to edit the section.
- In the panel, go to Advanced > Motion Effects.
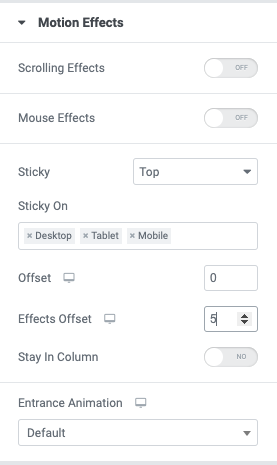
Advanced
Motion Effects
- Sticky: Click Top to choose to stick the header to the top. Other options include Bottom or None.
- Sticky On: Choose which devices to stick the header, including Desktop, Tablet, and Mobile.
- Offset: Pushes the sticky element up or down by pixels.
- Effects Offset: Set the number of pixels scrolled before the header effects take place.
Note: The Offset Effects options only work when Custom CSS is applied.
Custom CSS
Add your own custom CSS here. Below is an example of CSS that changes the header’s background color, transparency, and height, with an easing animation effect.
selector.elementor-sticky--effects{ background-color: rgba(133,130,255,0.5) !important }
selector{ transition: background-color 2s ease !important; }
selector.elementor-sticky--effects >.elementor-container{ min-height: 80px; }
selector > .elementor-container{ transition: min-height 1s ease !important; }
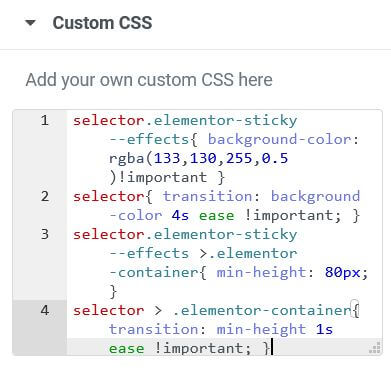
Note: This CSS will take effect when the user has scrolled the number of pixels specified in the Offset options.