With Elementor, you can add custom HTML attributes to the <a> element of every link. This enables the addition of data-* attributes, ARIA attributes (accessibility) and values, header, footer, sidebar, rel=*, and other attributes that can be found here
Common Link Attributes use cases include:
- Allow your visitors to download PDF files with a single button click by using the download=”yourfilename” custom attribute.
- Implement relations SEO properties such as rel=”noopener”, rel=”noreferrer”, rel=”ugc”, and “rel=sponsored”. To add multiple properties to one attribute, simply list them with a space between them, e.g. rel=”noopener noreferrer”.
- Add a title attribute to link elements, such as title=”Learn More About Us”.
Tip: You can add multiple Link Attributes separated with a comma (,)
Add Custom Attributes to Link Elements of A Widget
If a widget has a Link element, you can add any custom attributes to the link’s HTML, (e.g. rel=”ugc” or rel=”sponsored”, the two new link attributes that Google introduced in 2019).
- Right-click on the widget’s handle and click Edit widget to open the widget’s settings panel.
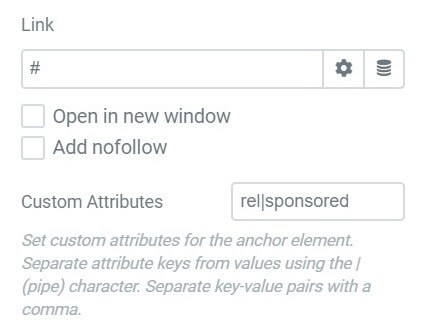
- Click the gear icon to the right of the Link field to open up the additional options.

- Add your code in the Custom Attributes field, using the format key|value. For example, to add rel=”sponsored” to the element’s HTML, enter rel|sponsored here. To add rel=”ugc” to the element’s HTML instead, enter rel|ugc here. To add a title to the link element, enter title|Your title text goes here.
Tip: If you add a title attribute, it will only display as a popup tooltip on hover if there is something in the Link URL field, so there must be at least a # in the field. It cannot be blank for the hover tooltip to work.
Note: There is no ability to add a custom attribute to a link created within a Text Editor widget. Custom attributes are only available for widgets that specifically have a link field.

Add A Download Custom Attributes to a Button
To cause a file to be immediately downloaded when a user clicks a button, add a download=”yourfilename” attribute to the button’s link.
- Right-click on the Button widget’s handle and click Edit widget to open the widget’s settings panel.
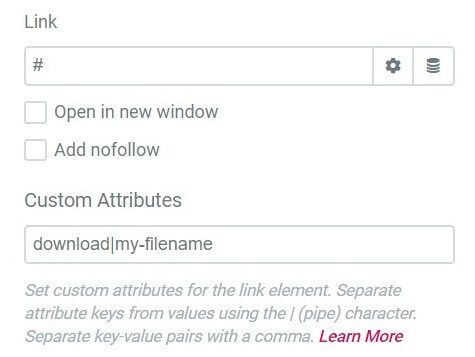
- Click the gear icon to the right of the Button’s Link field to open up the additional options.
- Add the attribute code in the Custom Attributes field, using the format key|value. For example, to add download=”yourfilename” to the element’s HTML, enter download|your-file-name here, replacing “your-file-name” with the file name of your choosing.

Tip: To create a downloadable PDF, in the Link field, enter the PDF’s link, and then enter download|your-file-name in the Custom Attributes field.
Note: You will not be able to add JS-based attributes (like onclick) to your links due to security reasons.
